在本文中,将介绍如何使用 Tkinter Notebook 小部件创建选项卡。
Notebook 是由 Tkinter Ttk 模块引入的强大小部件。允许开发者创建包含多个选项卡的界面,每个选项卡可以包含不同的内容。
创建 Notebook 小部件,请使用如下构造函数:
notebook = ttk.Notebook(master,**kw)
添加选项卡有两种方式可以为 Notebook 小部件添加选项卡。使用 add() 方法,在末尾附加一个新选项卡。使用 insert() 方法,可将选项卡添加到特定位置。
add() 方法
add(child, **kwargs)
insert() 方法
insert(location, child, **kwargs)
import tkinter as tkfrom tkinter import ttkroot = tk.Tk()root.geometry('600x400+200+200')root.title('Notebook 选项卡演示')label = ttk.Label(root, text = "选项卡演示")label.pack(ipadx=5, ipady=5)notebook = ttk.Notebook(root)notebook.pack(fill='both', expand=True)frame1 = ttk.Frame(notebook)frame2 = ttk.Frame(notebook)label1 = ttk.Label(frame1, text = "第一个选项卡区域")label1.pack(expand=True)label2 = ttk.Label(frame2, text = "第二个选项卡区域")label2.pack(expand=True)frame1.pack(fill='both', expand=True)frame2.pack(fill='both', expand=True)# 方法1notebook.add(frame1, text='选项卡1')notebook.add(frame2, text='选项卡2')frame3 = ttk.Frame(notebook) label3 = ttk.Label(frame3, text = "第三个选项卡区域")label3.pack(expand=True)frame3.pack(fill= tk.BOTH, expand=True)# 方法2notebook.insert("end", frame3, text = "选项卡3")root.mainloop()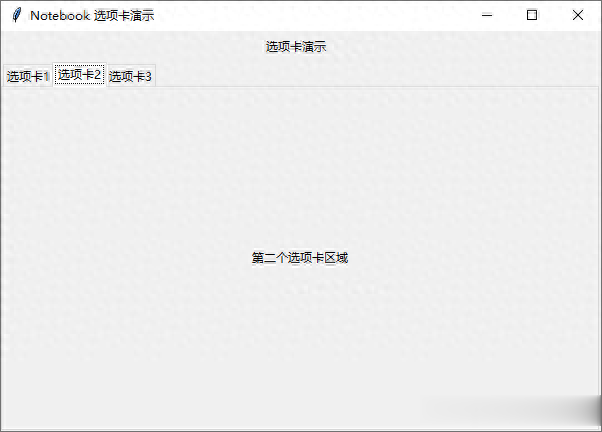 访问选项卡
访问选项卡select()
select() 方法,不带任何参数将返回当前选定的选项卡。使用参数可以切换选项卡。
select(tab_id)
tab() 方法
tab() 方法,可以通过选项卡的 ID 访问选项卡的某些选项。
tab(tab_id, **kwargs)
import tkinter as tkfrom tkinter import ttkroot = tk.Tk()root.geometry('600x400+200+200')root.title('Notebook 选项卡演示')def tab_selected(event): tab_id = notebook.select() tab_text = notebook.tab(tab_id, 'text') label2['text'] = tab_text frame = ttk.Frame(root)label1 = ttk.Label(frame, text = "当前选项卡:")label1.pack(side=tk.LEFT,)label2 = ttk.Label(frame, text = "")label2.pack()frame.pack()notebook = ttk.Notebook(root)notebook.pack(fill='both', expand=True)frame1 = ttk.Frame(notebook)frame2 = ttk.Frame(notebook)label3 = ttk.Label(frame1, text = "第一个选项卡区域")label3.pack(expand=True)label4 = ttk.Label(frame2, text = "第二个选项卡区域")label4.pack(expand=True)frame1.pack(fill='both', expand=True)frame2.pack(fill='both', expand=True)notebook.add(frame1, text='选项卡1')notebook.add(frame2, text='选项卡2')notebook.bind("<<NotebookTabChanged>>", tab_selected)# 默认选择第二个选项卡notebook.select(1)root.mainloop() 自定义选项卡
将图像添加到选项卡标题
使用 Notebook 的 image 选项,将图片添加到选项卡的标题
import tkinter as tkfrom tkinter import ttkroot = tk.Tk()root.geometry('600x400+200+200')root.title('Notebook 选项卡演示')label1 = ttk.Label(root, text = "自定义选项卡")label1.pack()notebook = ttk.Notebook(root)notebook.pack(fill='both', expand=True)frame1 = ttk.Frame(notebook)frame2 = ttk.Frame(notebook)label3 = ttk.Label(frame1, text = "第一个选项卡区域")label3.pack(expand=True)label4 = ttk.Label(frame2, text = "第二个选项卡区域")label4.pack(expand=True)frame1.pack(fill='both', expand=True)frame2.pack(fill='both', expand=True)tab_image = tk.PhotoImage(file = "exit.png")notebook.add(frame1, text='选项卡1', image = tab_image, compound = "left")notebook.add(frame2, text='选项卡2')root.mainloop()
垂直方向选项卡
自定义 Ttk Notebook 样式,设置参数 tabposition 为 wn,创建垂直方向选项卡。
import tkinter as tkfrom tkinter import ttkroot = tk.Tk()root.geometry('600x400+200+200')root.title('Notebook 选项卡演示')label1 = ttk.Label(root, text = "自定义选项卡")label1.pack()style = ttk.Style()style.configure("Custom.TNotebook", tabposition="wn") notebook = ttk.Notebook(root, style="Custom.TNotebook")notebook.pack(fill='both', expand=True)frame1 = ttk.Frame(notebook)frame2 = ttk.Frame(notebook)label3 = ttk.Label(frame1, text = "第一个选项卡区域")label3.pack(expand=True)label4 = ttk.Label(frame2, text = "第二个选项卡区域")label4.pack(expand=True)frame1.pack(fill='both', expand=True)frame2.pack(fill='both', expand=True)notebook.add(frame1, text='选项卡1')notebook.add(frame2, text='选项卡2')root.mainloop()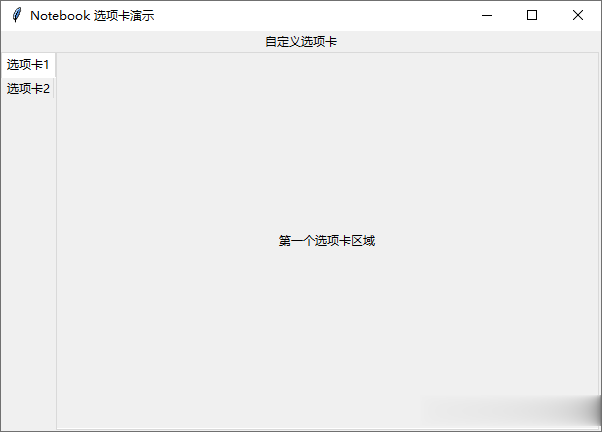
更改主题美化选项卡
使用 theme_create() , style.theme_use 自定义更改当前主题,美化选项卡。
import tkinter as tkfrom tkinter import ttkroot = tk.Tk()root.geometry('600x400+200+200')root.title('Notebook 选项卡演示')style = ttk.Style()style.theme_create( "dummy", parent="alt", settings={ "TNotebook": {"configure": {"tabmargins": [2, 5, 2, 0] } }, "TNotebook.Tab": {"configure": {"padding": [5, 1], "background": "#DCF0F2" }, "map": {"background": [("selected", "#F2C84B")], "expand": [("selected", [1, 1, 1, 0])] } } } )style.theme_use("dummy")notebook = ttk.Notebook(root)notebook.pack(fill='both', expand=True)frame1 = ttk.Frame(notebook)frame2 = ttk.Frame(notebook)label3 = ttk.Label(frame1, text = "第一个选项卡区域")label3.pack(expand=True)label4 = ttk.Label(frame2, text = "第二个选项卡区域")label4.pack(expand=True)frame1.pack(fill='both', expand=True)frame2.pack(fill='both', expand=True)notebook.add(frame1, text='选项卡1')notebook.add(frame2, text='选项卡2')root.mainloop()