点击关注 关注我们吧~

对于绘图时常使用的辅助构造线,水平、垂直等都可以很容易的掌握,那么,其中的偏移功能是如何使用的呢?
1、打开cad软件,选绘制二条直线出来。再点击构造线。效果如下:

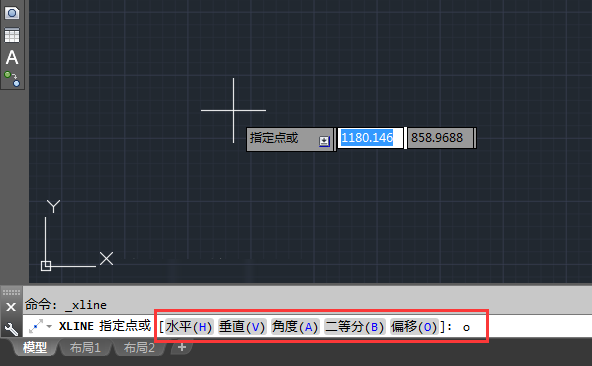
2、进入XLINE命令后,点击偏移(o)或是输入O空格。
3、然后输入要偏移的距离,比例200空格。

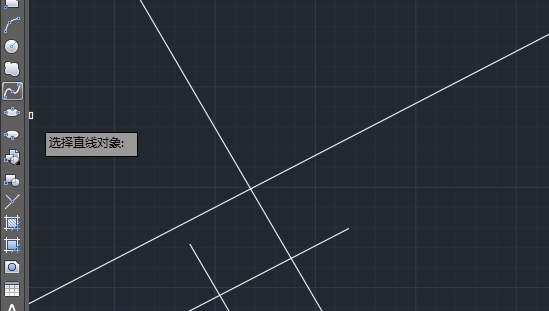
4、选择直线对象,就是选要偏移的参照直线。效果如下:

5、然后指定向哪侧偏移。直线有两侧,根据自身情况而定。

6、设置好后,同样的方法可以选另一条哦。也可以再一些偏移哦。

7、最后效果如下:
点击关注 关注我们吧~
对于绘图时常使用的辅助构造线,水平、垂直等都可以很容易的掌握,那么,其中的偏移功能是如何使用的呢?
1、打开cad软件,选绘制二条直线出来。再点击构造线。效果如下:
2、进入XLINE命令后,点击偏移(o)或是输入O空格。
3、然后输入要偏移的距离,比例200空格。
4、选择直线对象,就是选要偏移的参照直线。效果如下:
5、然后指定向哪侧偏移。直线有两侧,根据自身情况而定。
6、设置好后,同样的方法可以选另一条哦。也可以再一些偏移哦。
7、最后效果如下: